FRIDAY - AI Test Agent
An AI-powered test agent that uses Generative AI and LangChain to automatically create test cases from Jira/GitHub issues and execute API tests, for a streamlined testing experience.
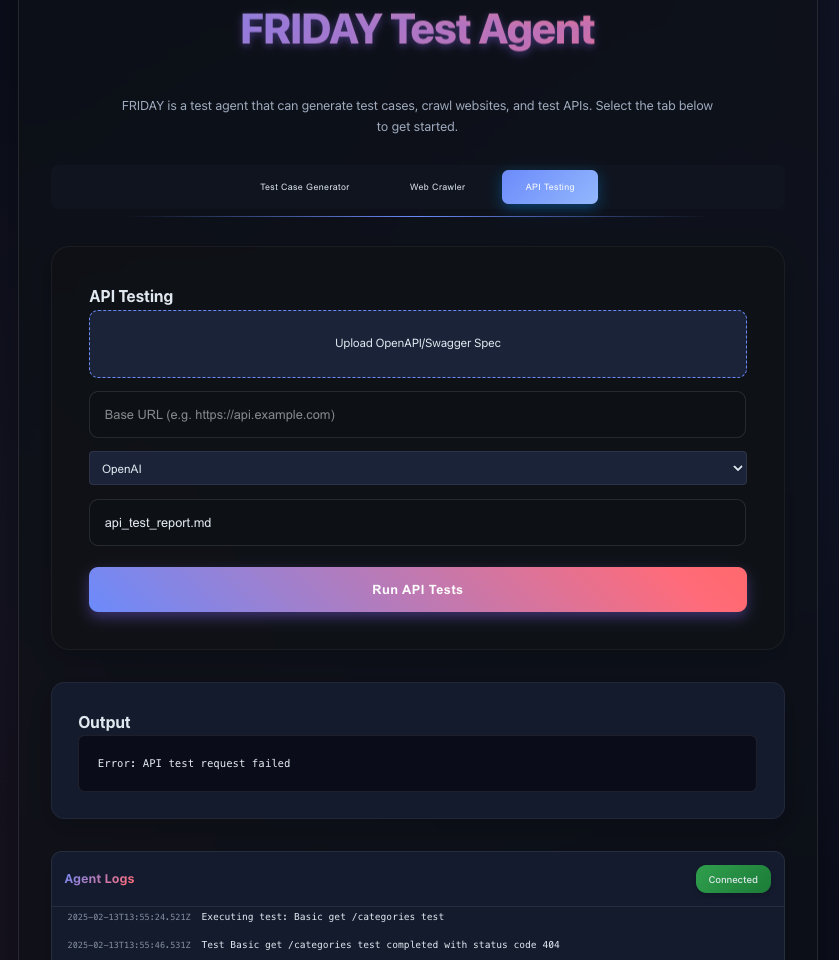
- Web Application: React-based UI running on port 3000 for visual interaction
- CLI Application: Command-line tool for quick test case generation and web crawling
- REST API: FastAPI service running on port 8080 for system integration
![]()
✨ Key Features
- AI-Powered Test Case Generation: Leverage Google Gemini, OpenAI or mistral to generate test cases.
- Requirement Extraction: Automatically extract requirements from Jira tickets or GitHub issues.
- Contextual Integration: Incorporate relevant context from Confluence pages.
- LangChain Processing: Utilize LangChain for advanced prompt engineering.
- Vectorized Storage: Store and search documents efficiently using ChromaDB vectorization.
- Flexible Export: Export test cases in JSON or Markdown format.
- Web Crawling: Enhance context by creating embeddings using a web crawler.
- API Testing: Execute API tests using OpenAPI specifications.
⚙️ Setup
Prerequisites
- Python 3.12+
- Gemini enabled or OpenAI API key
- Jira/GitHub and Confluence access credentials
Installation
-
Install via Homebrew:
brew tap dipjyotimetia/friday
brew install friday -
Run setup:
friday setup
⚡️ Usage
CLI Application
# From Jira
friday generate --jira-key PROJ-123 --confluence-id 12345 -o test_cases.md

# From GitHub
friday generate --gh-issue 456 --gh-repo owner/repo --confluence-id 12345 -o test_cases.md

# Crawl single domain
friday crawl https://example.com --provider openai --persist-dir ./my_data/chroma --max-pages 5

# Crawl multiple domains
friday crawl https://example.com --provider openai --persist-dir ./my_data/chroma --max-pages 10 --same-domain false

friday --help          # Show all commands
friday version         # Display version
friday generate --help # Show generation options
friday crawl --help    # Show crawling options
REST API
uvicorn friday.api.app:app --reload --port 8080

# Generate test cases
curl -X POST http://localhost:8080/api/v1/generate \
  -H "Content-Type: application/json" \
  -d '{
    "jira_key": "PROJ-123",
    "confluence_id": "12345",
    "output": "test_cases.md"
  }'

# Run API tests
curl -X POST "http://localhost:8000/api/v1/testapi" \
  -H "Content-Type: multipart/form-data" \
  -F "base_url=https://petstore.swagger.io/v2/pet" \
  -F "spec_upload=@./docs/specs/petstore.yaml" \
  -F "output=report.md"
Web Application
cd friday/app
npm install
npm start

Open http://localhost:3000 in your browser

* Generate test cases from Jira/GitHub issues
* Execute API tests with OpenAPI specifications
* Crawl websites for additional context
* View real-time test execution logs
🛠️ Development
-
Clone and setup:
git clone https://github.com/dipjyotimetia/friday.git
cd friday
chmod +x prerequisites.sh
./prerequisites.sh -
Configure environment:
cp .env.example .env
# Add your credentials to .env -
Run Tests:
poetry run pytest tests/ -v -
Format Code:
poetry run ruff format -
Deploy to Google Cloud:
chmod +x deploy.sh
PROJECT_ID="your-project" REGION="us-west1" ./deploy.sh
🐳 Development Container Setup
This project uses Visual Studio Code's Development Containers feature, providing a consistent development environment via Docker.
Prerequisites
Features
- Python 3.12 with Poetry package management
- Node.js 22 with npm
- Docker-in-Docker support
- Pre-configured VS Code extensions:
- Python and Pylance
- ESLint
- Prettier
- Docker
- Ruff (Python linter)
Environment Variables
Required environment variables (set these before opening the dev container):
GOOGLE_CLOUD_PROJECT
GOOGLE_CLOUD_REGION
GITHUB_ACCESS_TOKEN
GITHUB_USERNAME
JIRA_URL
JIRA_USERNAME
JIRA_API_TOKEN
CONFLUENCE_URL
CONFLUENCE_USERNAME
CONFLUENCE_API_TOKEN
OPENAI_API_KEY
GOOGLE_API_KEY
Services
The development environment includes three services:
workspace: Main development containerapi: FastAPI backend service (port 8080)- app: Frontend application (port 3000)
Getting Started
- Clone the repository
- Copy .env.example to .env and fill in your credentials
- Open in VS Code
- Click "Reopen in Container" when prompted
- The container will build and install all dependencies automatically